0 members and 26,370 guests
No Members online

» Site Navigation

» Stats
Members: 35,442
Threads: 103,075
Posts: 826,688
Top Poster: cc.RadillacVIII (7,429)
|
-

Bullet holes give images that beat up look. They can generally be used with any theme. This is the first tutorial I wrote, so hopefully I get everything right  . .
1.) Create a new document that is 400x400 (I set resolution to 300 but you can leave it at 72 if you wish). And you can choose any background you wish, I chose #194390. Now, create a new layer. 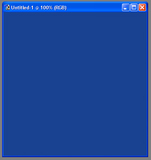
2.) Select the circular marquee tool. You can do this by right clicking where the rectangular marquee tool is and select the circular one from the menu. 
Now, select somewhere for your bullet hole. (Hint: Holding the 'shift' key down while you are making your selection will create a perfect circle)
Next, fill in the selected area with black. 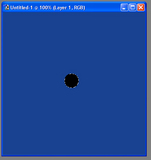
Then, place more filled in black circle in random places but don't over do it. 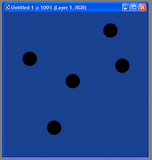
3.) Select Filter/Pixelate/Fragment from the menu. 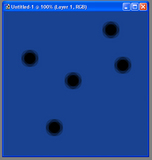
Next, select Filter/Sketch/Chrome and set detail = 10 and smoothness = 0. 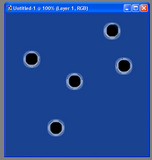
Then, make sure you have black set as your foreground color and white as your background color in the tool bar (  ). Select Filter/Sketch/Chalk & Charcoal and make sure your settings are: Chalk Area = 6, Charcoal Area = 6, & Stroke Pressure = 1. ). Select Filter/Sketch/Chalk & Charcoal and make sure your settings are: Chalk Area = 6, Charcoal Area = 6, & Stroke Pressure = 1. 
4.) Duplicate this layer and set Blend Mode to Hard Light ( 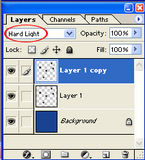 ). And your finished. Heres what my final looked like: ). And your finished. Heres what my final looked like: 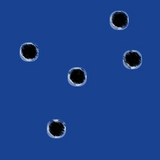
My site: http://www.freewebs.com/kickmyflipstudios/
-
I touched it up a bit, nice job mate (made it display the pictures). Is it ok if I submit tutorial to a few sites?
-
You have my permission!!! But don't forget to credit me, hehe!
-
Will do mate =). I just wanted to thank you good - its a pretty rockin' tutorial =). Hopefully it will get accepted to a few sites =).
-
put that onto some cheapass car... X_X
-
Excellent for a first tutorial. Short and sweet. If I may suggest for future writings (i hope you do more) to include keystrokes for new folks (like ctrl-m, alt-d, things of that nature).
-
Originally posted by noprotein@Jan 18 2005, 05:23 PM
Excellent for a first tutorial. Short and sweet. If I may suggest for future writings (i hope you do more) to include keystrokes for new folks (like ctrl-m, alt-d, things of that nature).
[snapback]1374[/snapback]
I too, agree. In my tutorials, I try to take PRNT SCREENS of it all. Its still great though. If people have questions, we suggest they post on this thread so we can assist them =).
-
If I double posted on this I'm sorry, I am new to the boards and to photoshop.
Kickmyflip, thanks for the nice tutorial. I'm trying out all the ones that catch my eye.\
tacoX, First I'd like to thank you for all of your tutorials, I've tryed several. You responded to this one by saying that you cleaned this up a little. Am I out of line in asking what you might have done to clean it up a bit?? Thanks again. 
-
he added the images, before I had just links to the images. he put them in the post.
-
Oh yea I'm gonna use it for my gaming clan thx man
Similar Threads
-
By blockk in forum Support
Replies: 0
Last Post: 06-03-2006, 04:01 AM
-
By Bradley in forum Sigs & Manips
Replies: 3
Last Post: 04-05-2005, 04:48 PM
 Posting Permissions
- You may not post new threads
- You may not post replies
- You may not post attachments
- You may not edit your posts
-
Forum Rules
|


 Reply With Quote
