0 members and 7,425 guests
No Members online

» Site Navigation

» Stats
Members: 35,442
Threads: 103,075
Posts: 826,688
Top Poster: cc.RadillacVIII (7,429)
|
-

Here is a tutorial for a beam like this:

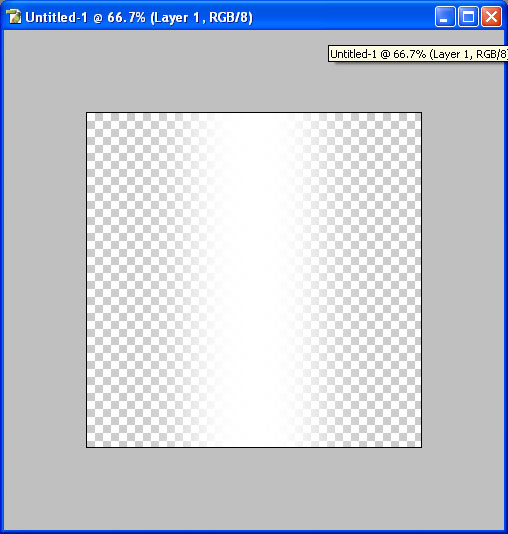
First, create a blank canvas. I made mine 500 by 500.
Then zoom out once.

Then, take a white brush(I used 250) and make a line starting form outside the canvas down outside the canvas, so there is a line covering the whole canvas.
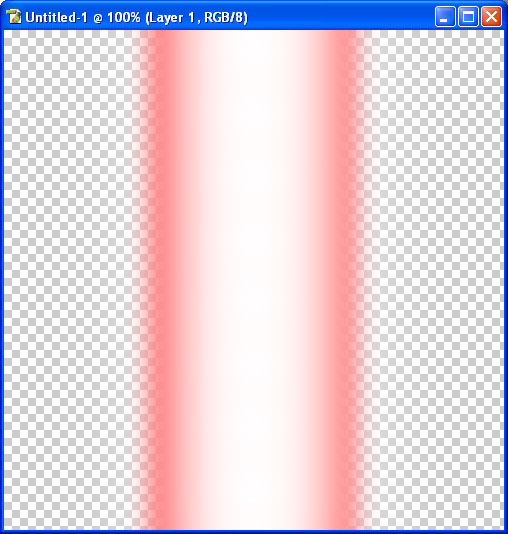
Then select the layer with the marquee tool. Be sure to select the whole thing. Now go Edit>Fill(Or Shift+F5). Pick whatever color you want(I used red, or #FF0000) and set the blending mode to Color. At this point, you can zoom out.

Yes, I know that looks like crap. Go to Filter>Blur>Gaussian Blur and use 10, depending on what size yours is. It should look like this.
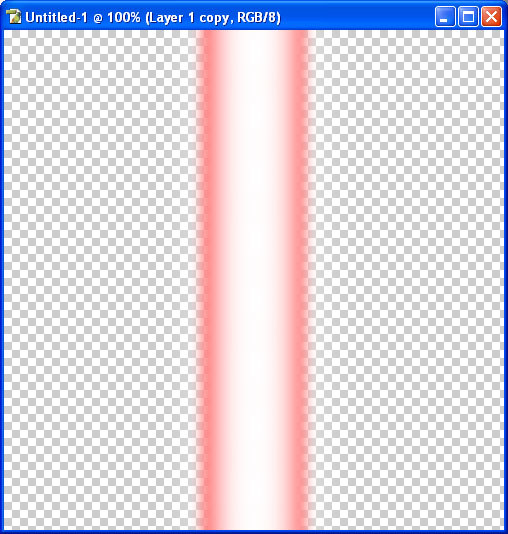
Looking slightly better. Now double the layer(drag the layer into the New Layer icon) and make it about half as wide. Make the layer under invisible for now so the top one is easier to work with.
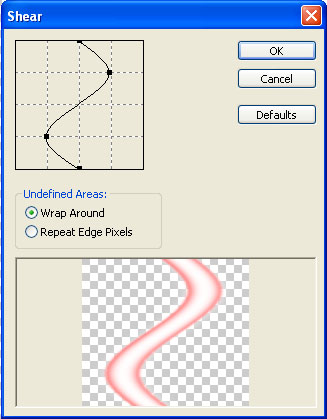
Now go to Distort>Shear. Use these settings or something similar.
Now duplicate the layer and move it up so that they look connected. Keep doing this until it covers the whole canvas. Then, merge all the layers. Mess around with the widths of the wavy part, the beam, or both to the point where the beam is completely inside the waves.

Cut the wave layer on every other place where it crosses the beam. Then paste it right where it was. Merge and flatten the pasted parts into one layer. Then move the original wave layer under the beam. Now make the beam layer underneath thinner until there are no visible seams. Now just merge everything and flatten.

EXTRA: Add a red and black background and it will look better.

Yeah, I know. You can see the lines and whatnot, but it usually doesn't happen
EDIT: I just realized it looks pretty cool with bright blue.
Here
And with a bigger canvas.
-
thats nice! i really like it! one tip to make the last step easier, you can just use a rectangle marquee to select where the overlapping beam is then do "layer via cut" and move the layer below the other beam. very nice!
If you want help...
Screw you
If you make sigs...
Screw you
-
That's what I did. I think. I selected every other intersection and stuff and copied to a new layer..
-
oh, sorry. the way you said "put it back where it was" made it sound different. my bad dude.
If you want help...
Screw you
If you make sigs...
Screw you
-
I do mean put it back where it was. As in make it look just like it did in the beginning, except when you move the original layer under, then you can see one is over the other.
EDIT: I've used this for at least one academic assignment too. I thought it up last week at computer class. Just screwing around with photoshop...
REEDIT: Here is an example of what I've done.
Here
-

wow thanks...it looks hard to make but once you go through the steps...it's easy well except
Then move the original wave layer under the beam. Now keep duplicating the original wave layer until there are no visible seams. Now just merge everything and flatten.
I had a littlel trouble with that.
-
Was it confusing or did it just not look good? I decided to change that step to make the middle beam thinner until there are no seams and then flatten. :P
-
Cut the wave layer on every other place where it crosses the beam. Then paste it right where it was. Merge and flatten the pasted parts into one layer. Then move the original wave layer under the beam. Now make the beam layer underneath thinner until there are no visible seams. Now just merge everything and flatten.
I got stuck right there an i dont know what u mean by cut tht wave layer :huh: can u help me with that?

:.:eNtEr:A:dIfFeReNt:WoRLd:In:LeSs:ThAn:A:bLiNk:.:
-
It looks great man! Thank you very much for your submission! The only thing is that you used photobucket to upload your pictures - and they have ultra strict badnwith limitations. I'm going to transfer this onto gfxvoid's server in a bit (although it will delay submission).
For future reference, read this thread:
http://forums.gfxvoid.com/t-1199.htm
-
By the wave layer I mean the layer you used the Shear filter on. And just use the Marquee tool to select the part that crosses over. Cut that and paste it onto a new layer.
Taco, when I first checked in the Web Graphics section and noticed my tutorial missing, I was like, "WTF". At least I know it's somewhere. If you want, I can put the pictures onto IMGHST or something(I never found out until like...1 hour ago. Notice my sig is part of eagleimg I believe.
Similar Threads
-
By RAHTING in forum Sigs & Manips
Replies: 8
Last Post: 09-20-2005, 02:43 PM
-
By jerner in forum Digital Art
Replies: 6
Last Post: 04-09-2005, 12:29 PM
-
By Pleymo in forum Digital Art
Replies: 17
Last Post: 03-31-2005, 10:42 AM
 Posting Permissions
- You may not post new threads
- You may not post replies
- You may not post attachments
- You may not edit your posts
-
Forum Rules
|


 Reply With Quote


