0 members and 7,424 guests
No Members online

» Site Navigation

» Stats

Members: 35,442
Threads: 103,075
Posts: 826,688
Top Poster: cc.RadillacVIII (7,429)
|
-
 Abstract Twist Tutorial Abstract Twist Tutorial
NOTE: The first 7 steps of this tutorial are thanks to Taco from his tutorial "Abstract Black Hole." I tried it out and wanted to variate it, and this is what I got. Thanks Taco.
1. Create a new document, mine was 300x300, yours can be any size, just try not to go smaller than that.
2. Fill the background layer with black.
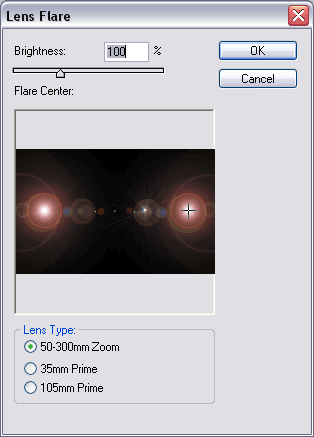
3. Still on the background layer, render two lens flares. Pick the very middle of the image, and go all the way to the edge of the image on both sides and put them there.
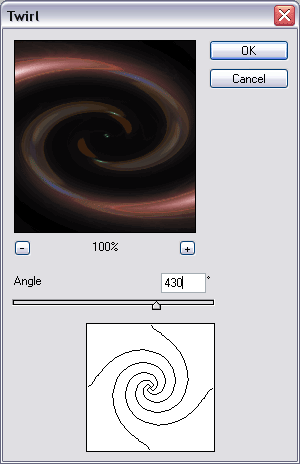
4. Go Filter>Twirl and set the angle at 430.
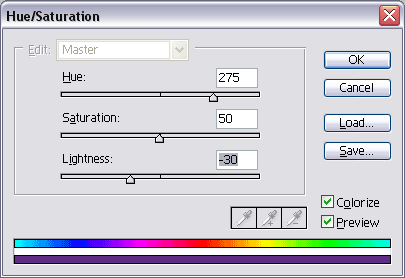
5. Duplicate the layer (Control+J) and then hit Control+U to change the color. Make sure you check the Colorize box. (I used Hue:240, Saturation:25, Lightness:0)
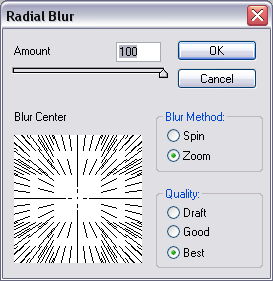
6. On your new layer, go Filter>Blur>Radial Blur with the following settings:
7. Change the blending mode. To do that, double click the layer, and set it to either Linear or Color Dodge. (I think Linear Dodge looks better, and that is what I used.)
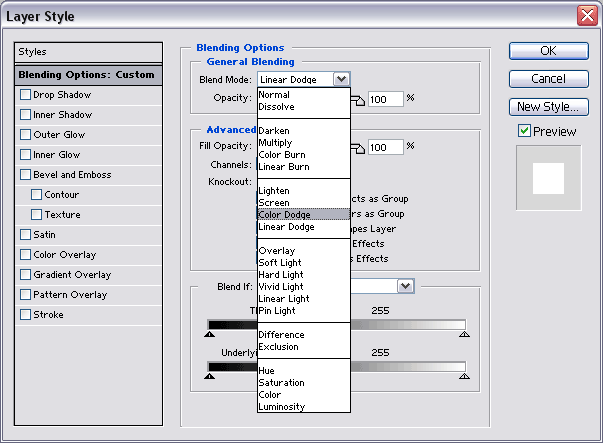
8. Merge the two layers, then duplicate the background layer again.
9. On that layer, go Filter>Distort>Twirl with the angle at -860.

10. Set that layer mode to screen, merge the two, and duplicate the background again.
11. Control-click the duplicated layer and go Edit>Copy.
12. Go to File>New and keep the same settings.
13. Paste the picture onto the blank area. You can change the color if you want. (Control+U)
14. Then do Image>Rotate Canvas>90 CW.

15. Control-Click the layer, and copy it. Go back to your original image.
16. Create a new layer. Paste the picture, and set that layers' mode to lighten. Merge all layers.
Extra: I duplicated the layer once more and set that mode to 'Soft Light.'
Final Image:

-

Can we get an image of your finial product please?
-

Sorry, I'm editing the post with more pictures right now.
-

I've seen two similar results in other tuts on this site...
-

There are many similar tutorials, although I doubt it was actually influenced by that =).
Thanks for the tutorial mate =)
-

As you can see I'm still new here, and I haven't seen any other tutorials like this so if there are doubles I can take this one down. Just let me know. Thanks for the comments though.
-
-

That looks nice 
-

Thanks guys, much appreciated.
-

Nice effect.. good and thorough tutorial.
I also noticed your from Maine, me 2.

Thanks,
Derek
Similar Threads
-
By Ravon in forum Other Tutorials
Replies: 14
Last Post: 06-18-2005, 05:17 AM
 Posting Permissions
- You may not post new threads
- You may not post replies
- You may not post attachments
- You may not edit your posts
-
Forum Rules
|


 Reply With Quote


