0 members and 13,692 guests
No Members online

» Site Navigation
» Stats
Members: 35,442
Threads: 103,075
Posts: 826,688
Top Poster: cc.RadillacVIII (7,429)
|
-
This is a tutorial for a granite like image.
First make a new image, I made mine 500x500px.
Now press D to reset the swatches to it's default colour.
Now apply a Clouds filter by going to Filters > Render > Clouds
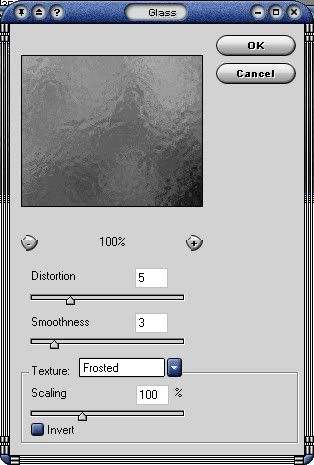
Next go to Filter > Distort > Glass and use these settings

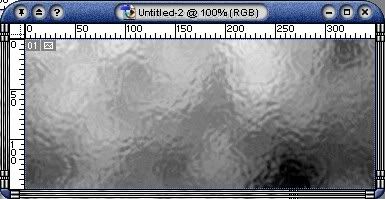
Now go to Image > Adjustments > Levels and increase the contrast so that it will look something like this.

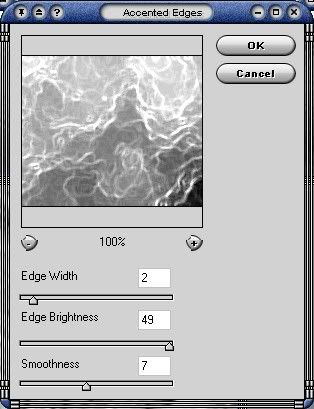
After that go to Filter > Brush Strokes > Accented Edges and use these settings

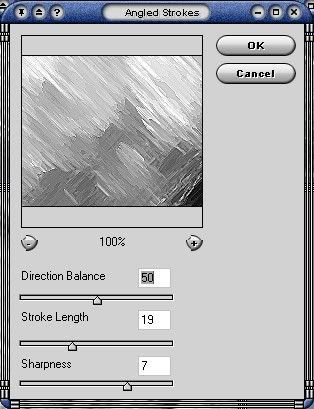
Go to Filter > Brush Strokes > Angled Strokes now and use these settings

Next go to Filter > Stylize > Find Edges
And finally, go to Filter > Blur > Gaussian Blur with a setting between 1 and 2.
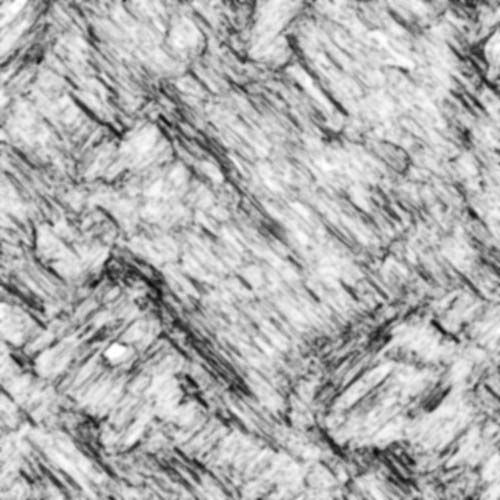
This is what I got with the above steps.

-
whoaa thats actually pretty sweet man, good job!
If you want help...
Screw you
If you make sigs...
Screw you
-
Very cool tutorial, comes out with a great result, it is very realistic. Thanks for submitting, please write some more, they are good.
-
Verry cool , it make's me think of feathers somehow. Nice tut !
-
Thanks for the great comments!
Feathers? :huh:
-
Looks good i might use it some day
-
MYeah , somehow it looks a bit like feathers , but then yet again , I'm a bit crazy :P
-
Nice..this works great for textures
Similar Threads
-
By tacoX in forum Other Tutorials
Replies: 5
Last Post: 06-16-2006, 07:57 AM
-
By tacoX in forum Other Tutorials
Replies: 8
Last Post: 01-15-2006, 10:40 PM
-
By makibird in forum Resources
Replies: 0
Last Post: 04-17-2005, 02:01 PM
Posting Permissions
- You may not post new threads
- You may not post replies
- You may not post attachments
- You may not edit your posts
-
Forum Rules
|