0 members and 4,301 guests
No Members online

» Site Navigation

» Stats
Members: 35,442
Threads: 103,075
Posts: 826,688
Top Poster: cc.RadillacVIII (7,429)
|
-
 Improvements Improvements
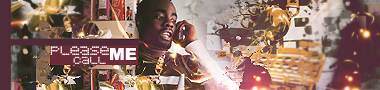
Hey, after studying from your tutorials for quite sometime, these are the products that I have produced. Thank you, I have learn alot.


Please post what needs to be improve and I will try to work it out.
Personally I think my text and border looks like shit hehe.
 ---------

-
firstly welcome 
secondly glad you liked our tutorials.
right now the sigs lol:
the third one i really like. What i think you need to work on is more interesting bgs and lighting. also i think you should use the motion blur filter less. keep trying tho and you will improve.
-
cool, lol, if u want summin different to do, try a car mod :P no one seems to do those much, lol. i like the third n fourth one, colours r good in the third and i love american fooball!  lol, dolphins vs jets at wembley!!!! i think, lol :S. the second one the stoke or outline of the render is jus a bit too thick for my likin, and the first one is good jus maybe a bit too much motion blur, but they're all good. Nice job and keep goin wit it. lol, dolphins vs jets at wembley!!!! i think, lol :S. the second one the stoke or outline of the render is jus a bit too thick for my likin, and the first one is good jus maybe a bit too much motion blur, but they're all good. Nice job and keep goin wit it.
-
welcome,
all are overcontrasted dude, maybe apart from 3rd
2nd is rly bad
work on colors and text
-
hehe thank you, the first one is my personal favorite. =)
The 2nd one I was trying a grungey-smudging combo
The 3rd one I was just messing around with lens flare and wave combonation.
The last one I was going for a bit paint-like feeling.
I didn't use any brushes even though I downloaded alot huhuh, just messing around with the stock photos.
---------
-
They all contain too much negative space, and seem a little flat.
Work on composition and depth, imo. Get a sense for when the image should naturally come to an end.
I don't know if you have or not, but it looks like you decided what size your image was going to be at the beginning rather than cropping it to its best format at the end.
I also agree with what DS has said above.
-
 Originally Posted by Jefster

I don't know if you have or not, but it looks like you decided what size your image was going to be at the beginning rather than cropping it to its best format at the end.
thats what i do... it works for me fine... o.O
-
I have no idea how to reduce the size of the original format that's the problem. I am using 375x100, do you just crop the edge area and then make that part white jefster? Though I don't know how to do make it white without making the whole tag white haha.
---------
-
use the crop tool... and just select the area you want to be your sig. i can show you when i get back from work if someone else hasnt by then.
-
If you just want to make everything smaller, use: Image > Image size and enter either the size or the percentage size you want, making sure that the 'constrain proportions' option in checked.
If you want to cut the edges from an image to emphasise a certain focal point then take the crop tool that looks like one of these:
Start in a corner of your image, at the beginning of the section you want to keep, and while you are pressing your left mouse button, drag the cropping square over it diagonally. Release the left mouse when you are satisfied. The area you are cropping off will darken. If you make a mistake, just hit the ESC button on your keyboard, (or right click and select cancel), and try again.
Or you can move the little squares in the corners to adjust the size of the square you want to crop. For very precise cropping you may need to zoom in on the image, because the crop tool tends to be a little 'sticky' at 100% or below.
 Posting Permissions
- You may not post new threads
- You may not post replies
- You may not post attachments
- You may not edit your posts
-
Forum Rules
|


 Reply With Quote