0 members and 389 guests
No Members online

» Site Navigation

» Stats
Members: 35,442
Threads: 103,075
Posts: 826,688
Top Poster: cc.RadillacVIII (7,429)
|
-
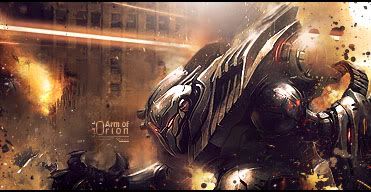
 My first sig My first sig
Heey, this is my first signature, and like my third time I tried doing something with Photoshop, so please don't flame. (Critisize all you want of course, I love to learn more)

I made this entirely on my own though.
Also, if someone could give me a link for some good fonts, cause this one sucks .
-

In signatures try to use standard fonts that don't look too flashy. You try to make a nice signature and the text should compliment it, unless you are making a typography piece I suggest you don't let your text draw the attention.
I suggest you read some tutorials, one of the best beginner tutorials (in my opinion) is this one by Senthrax:
http://senthrax.deviantart.com/art/F...orial-55042010
-
Ah okay thanks, I'll check it out and then I'll do my best to don't make my font too flashy.
Edit:
Now I followed the tutorial for a small piece of it and I'm a real noob. This is for a beginner, but I don't even know as much as a beginner.
In fact, I had to look up how to put the special brush the C4D or something, and now I kind of jus't put the C4D thingy in my signature, instead of making it a brush or something, like I saw in other vids.
Please help I'm desperate!
Last edited by tkskater; 07-23-2010 at 04:25 PM.
-
Don't worry about being confused by tutorials I know I was when I first started, it doesn't make you a bad beginner.
What bit of the tutorial exactly are you stuck on? one of the C4D bits?
And try I'll give you a few easy tips that you can slowly start to work on, don't try and focus on everything all at once though.
One of the most important parts of any piece of art is the focal point. It can be a building, an effect, a characters face anything you want to draw attention too.
Some of the easiest ways to do this in a signature is to 1 darken the edges by using a soft brush and brushing black onto a new layer and lowering the opacity to 20%, 30% or whatever you think looks best. You can also lighten the render itself by brushing, with a soft brush, white onto what you want to draw attention too and again lowering the opacity, you need to make sure you don't make it too bright though.
Another way is by using the blur and sharpen tools. Make a new layer with an applied image and with a soft brush on about 15% blur the background and sharpen the focal point. This will not only draw focus to your render but it will also create depth as well.
Another thing to look out for is lighting, try and follow the natural lighting on your render, if the render is lighter on the left hand side make the left hand side of the signature lighter as well. You can do this with black and white brushings on a lower opacity again.
And then Aether already mentioned about the font, keep it relatively small so it doesn't draw too much attention and make sure it's simple unless it's a major part of your sig.
This tut has some basic things about arrangement and colour as well as other things for your text, hope it's helpful:
http://warsh33p.deviantart.com/art/U...orial-38441798
One final thing is to try and get your render to blend into the effects and background a bit. You can do this by either smudging, but that can be quite tricky particularly if your just starting out. Another way is by using the burn tool and something called gradient maps which are in the adjustments section to try and match the colours better.
And finally, this way is easier for a beginner and creates an effect closer to smudging, is to get a soft brush with the eraser and just erase the very edge so you get a soft line instead of a hard one.
There are some other parts of sig making as well, such as flow and colour but to start off with everything can be a bit of an overload. Hope what I wrote helps you out a bit. If you've got any problems or questions just ask.
Fav:
Latest:

-
 Originally Posted by tkskater

In fact, I had to look up how to put the special brush the C4D or something, and now I kind of jus't put the C4D thingy in my signature, instead of making it a brush or something, like I saw in other vids.
Please help I'm desperate!
C4d's and brushes arn't the same things, you are meant to paste c4d's into your sig. You can find lots of c4d's on the internet. You can get rid of the black background by changing the layers blending mode to for example: linear dodge.
Last edited by Aether; 07-23-2010 at 06:28 PM.
-
Heey guys, Draywin:
First things first, Thanks! I tried what you suggested with the soft brush, at the edges, as you can see here:

But I dont think I used the right brush, so, where exactly is the soft brush?
Make a new layer with an applied image
Uhm, how to apply the image? Because I've seen it in video's, but I don't know how to anymore...
Aether: Thanks again, as you can see in this image I tried a C4D and what do you think?
Now both: What do you think of this signature? Please comment!
And of course, what do you think of my text? Not too flashy I hope!
-
It's definately an improvement! Text is better, c4d is placed properly. Obviously you have a lot to learn so I suggest you just keep practicing and reading tutorials.
I think Draywin was referring to the brush tool, wich allows you to draw using a brush, if you go to the top left of your screen (I think lol) there will be a button where you can adjust the shape and size, if you take a large round soft brush (soft means the edges are....soft) and go around the outer edges of your signature, it will darken the edges, this is just one of many ways to bring out your focal tho.
To apply an image you make a new layer and go to "Image" at the top of your screen and select apply image. It will copy every visible bit of your signature onto one layer wich is usefull sometimes.
-
Allright thanks a lot. I'm practising often haha, I already made a new sig only I don't know if it is an improvement though.. Check it out!

Better?
Only I didn't use the apply image here though... Cause I made this before I read your post.
-
Your like a signature making machine lol. It's great to see you practicing often.
Your second sig is a lot better and that was only one sig in one day imagine how much you can improve in a week or two. The text is much better and the C4D is nice, it compliments the line of her hair which gives your signature good flow.
And yeah sorry I should've explained some of what I meant better but yeah what Aether said lol.
I'm gonna say your second sig fits together better than your third, the flow (the C4D in line with her hair) looks really nice in your second sig and pink/red background goes better with it as well. The blue seems kind of out of place in your third sig but the background is better because you fill up all those empty areas.
Keep practicing and practicing different tutorials and styles and eventually you will find one that you really like. Nice work man.
Fav:
Latest:
-
Well thanks! I try to keep up, today I really had the flow going haha. About the blue being misplaced: I really wanted to use some blue, so I created the background with it first.. (not smart Then I added the render because I liked it alot, and then saw: oops!
Then I thought, ah, what the hell, let's give it a try lol.
One more thing though, I checked out the alien tutorial in the signature tutorials section, and I already made a post about it there.
But I don't know how to subtract the alien (render) from the black background.. Please help out, because I'd love to give that tut a try!
Unless it's kind of too advanced, then my search is not complete.
 Posting Permissions
- You may not post new threads
- You may not post replies
- You may not post attachments
- You may not edit your posts
-
Forum Rules
|


 Reply With Quote
