0 members and 5,996 guests
No Members online

» Site Navigation

» Stats
Members: 35,443
Threads: 103,072
Posts: 826,684
Top Poster: cc.RadillacVIII (7,429)
|
-
 Hobbits Photoshop Tutorial. Hobbits Photoshop Tutorial.
Ok heres my tutorial, in this tutorial i'll show you in simple steps to change
This:
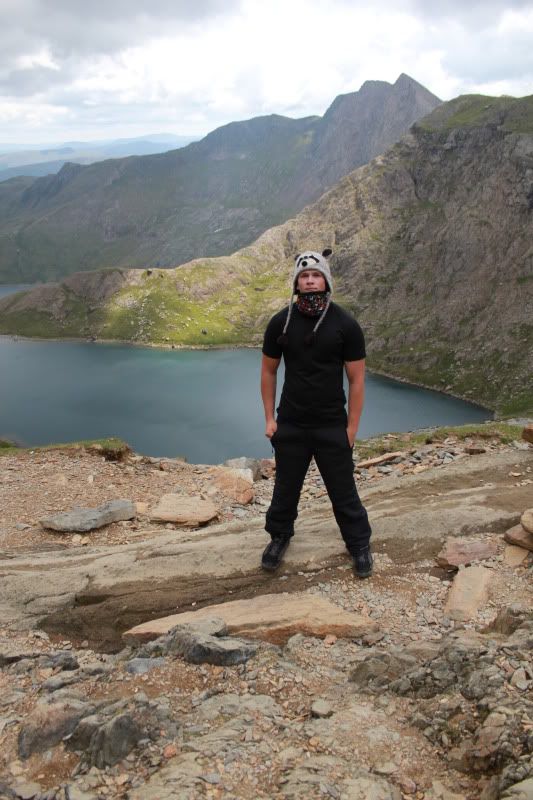
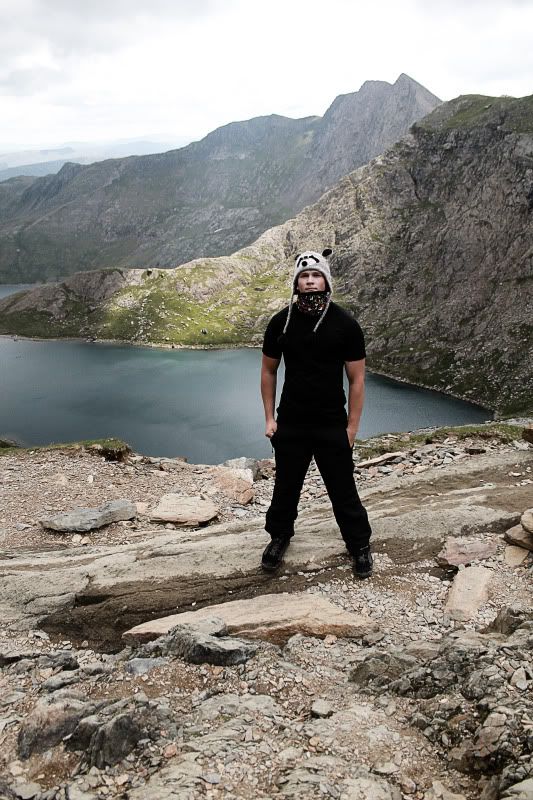
Into This:
In really simple steps!! its basically one of my secrets i never told many on my course about, and they were amazed at what i achieved.
ok step one.
Open photoshop and put your image into photoshop (works best with CS5)
lets say.. Use this image here.. right click and copy and paste into photoshop and use it so you can compare with my results and yours to see if you went wrong!!

With this image, first look in layers, if there is not just one layer merge the layers ( Shift+ Ctrl + E)
Then Duplicate the layer (ctrl + j)
You will notice you have two layers exactly the same like below,

then highlight the top layer as displayed above. go to filters > other > high pass. usually this is set to 5 ..
thats alright in most cases, but after this tutorial if you dont like what you have, restart and adjust!
you will be left with one layer grey layer, there should be a list you can go through above this layer. select "hard light"
you should be left with an image like below.

if you like your image as it is you may stop here, but for an extra depth and dramatic feel continue reading..
merge down your layers once again (shift + ctrl + e)
duplicate your layer (ctrl+ j) click on the top, image > Adjustments > Desaturate, or (shift + ctrl + u)
once you have done this the whole image should be in black and white,
select the scroll down menu of filters just above layers once again and select high pass again!
Now. you'll notice your photo should look like this,

sure it doesn't look real in some parts, so select eraser and adjust opacity, and rub out / dodge / burn until desired.
heres my final after erasing / dodging/ burning/

Enjoy!!!
---------------------------------------------------------------------------------------------------------
Self Aclaimed Photographical God.
"The Easiest Way To Make Money In Photography Is To Sell Your Camera"
-

I was just wondering about this effect today when I saw a black and white photo. GREAT.
-
Simple easy to follow, well written works awesome on wrinkly
Faces I must say.
-
haha the older the better! but if you have an image of someone with stubble its great!
Not reccomended for babies tbh, they will look really unhealthy and almost dead haha!
---------------------------------------------------------------------------------------------------------
Self Aclaimed Photographical God.
"The Easiest Way To Make Money In Photography Is To Sell Your Camera"
-
Cool technique, thanks for sharing!
Similar Threads
-
By Abablitz in forum Other Tutorials
Replies: 6
Last Post: 03-07-2011, 06:29 AM
-
By CharDude in forum Signature Tutorials
Replies: 13
Last Post: 07-09-2008, 02:26 PM
-
By VoodooGypsy in forum The Void
Replies: 3
Last Post: 03-25-2008, 08:53 AM
 Posting Permissions
- You may not post new threads
- You may not post replies
- You may not post attachments
- You may not edit your posts
-
Forum Rules
|


 Reply With Quote


