0 members and 2,031 guests
No Members online

» Site Navigation

» Stats
Members: 35,442
Threads: 103,075
Posts: 826,688
Top Poster: cc.RadillacVIII (7,429)
|
-
 Make a Sprite Signature MK Style Make a Sprite Signature MK Style
Okay, this is my first tutorial so I would appreciate some constuctive critism and possibly some good feedback. Im going to show you all how I made my Mortal Kombat Sig. Please bear in mind this is just basic stuff as I am self taught cause college is crap. My graphics teacher keeps asking me for help...
You will need Photoshop and ImageReady for this tutorial, I used the CS 8.0 Version. You will also need patience as this tutorial requires a lot of spare time.
Just to clarify, people ask, what are sprites?
Sprite is the technical term for a sequence of image sheets which will depict a characters action in a game or an animation.
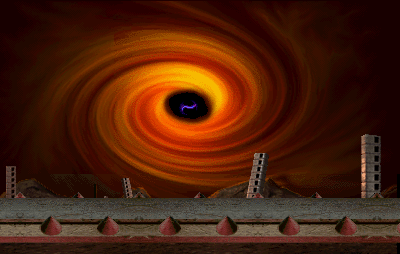
First you need to pick a background. I find everything I need that is Mortal Kombat and Sprite related on www.mortalkombatwarehouse.com and then I just browse the games. For this tutorial I will use this background:
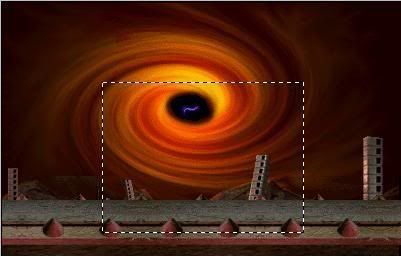
To get the exact size for your background just right click the background you want on the site, click copy. Then when you open up a new sheet in Photoshop using Ctrl + N it should automatically be sized for you. Then to paste the image press Ctrl + V. Now using the Rectangular Marquee Tool:

Using this tool, to repeat myself, choose a suitable area on your background which you can use for your animation. Since I used a bog standard background because its troublesome when you find a problem I used this area:
Now press Ctrl + C.
Press Ctrl + N to open up a new document and the press enter. Now your desired area should be avaliable. Now we are getting complicated so read the rest carefully. Small errors are usually because you missed a detail or something as such, I did that in my assignment and missed out on top marks. T.T Anyways.
Now we have a background we need a sprite sheet. I loved Ermac who was an error himself lol so I chose him. A link to him is: http://www.mortalkombatwarehouse.com/umk3/ermac/sprites/ and I used this row of sprites:
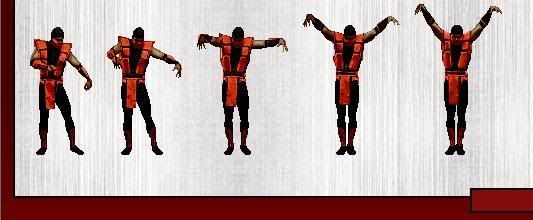
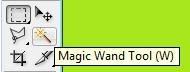
To get the sprite just press the "Prt Sc" button on the top right hand side of your keyboard and then open paint. After choosing the line you want paste it and select the area you want and save it as a JPEG. I reccomend doing this because photoshop is very awkward when copying print screens. Now you have his line use the magic wand tool to remove the background. The magic wand tool is this one:
Once you have deleted the background we need to make the images slightly bigger. To do this go into Edit > Transform > Scale and make them just a little big bigger, not too much. Now on your selected area you need to copy each of his movements one at a time like so into the area, remember to delete the white background from the sprite when you have copied him:
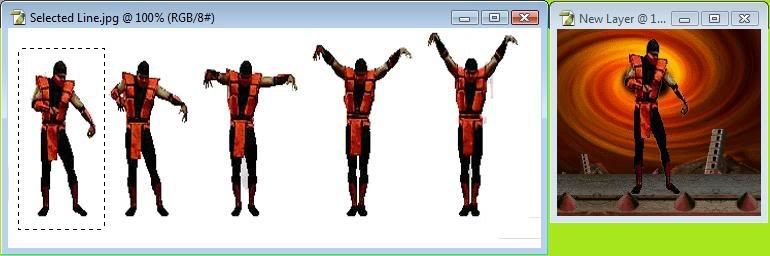
Now copy every single on into the same place. Remembering to delete the white background and to change the layer name so that it is in the correct order so his first movement would be 1, his second would be 2 Etc:

We now need to open this up in Imageready so use this icon:
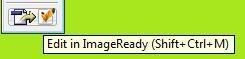
Its more than a little temper-mental with this button so if it doesnt work just use Ctrl + Shift + M. Once it is done we start the animation process. If you did things right Imageready should open and we should have your sprites with your selected area. It should look like this:
 A A
Okay now we need to slice them up. =P You will need as many layers as there are sprites. So I used 5 sprites, I need 5 layers. To make a new layer use this icon:

You now need to edit your five layers so that the sprite movement follows the layers, so on each animation layer for the first frame make sure only the first sprite is showing. You can edit which ones show on each from by selecting your animation later and then on your layer window there should be a small eye next to the layer itself. Make sure the only eye is on the sprite that matches the layer like so:

Once you have all your layers you then need to time them, by clicking the arrow next to 0 sec. underneath your image you can edit the timescale between frame, I find 0.1 is the best because it looks realistic. Once you have sorted your timing and you are happy just save the file as a GIF and it should be sorted.
For the advanced users here If you spot any mistakes or something I have missed tell me and I will edit the tutorial. If it doesnt work I screwed up big time for my first tutorial and if I can't fix my copy of ImageReady its back to designing cool fonts. I would love to show you my final product but my ImageReady keeps crashing for some reason. O.o I will just do it at College and then edit this tutorial to show you the final result.
Anyways, enjoy.
-
hehe nice guide :P
I will probaly try those sprites Animations sig later 
Similar Threads
-
By China-DoLL in forum Sigs & Manips
Replies: 4
Last Post: 06-12-2007, 05:32 PM
-
By Shadow in forum Sigs & Manips
Replies: 7
Last Post: 03-06-2007, 02:10 AM
-
By [PHXN] New001 in forum Sigs & Manips
Replies: 9
Last Post: 02-04-2007, 04:36 AM
-
By Juicy in forum Battlegrounds
Replies: 41
Last Post: 06-21-2005, 01:06 PM
 Posting Permissions
- You may not post new threads
- You may not post replies
- You may not post attachments
- You may not edit your posts
-
Forum Rules
|


 Reply With Quote
