


This tutorial will show you how to create a cool background and give it a cool abstract ice effect.
1) Create a New Document, for this tutorial I used 400x400 with 300 resolution. Fill your background with black.
2) Next, we are going to add some lens flares. Go to Filter/ Render/ Lens Flare and add a few lens flares with similarity to this, or be creative and do another pattern.
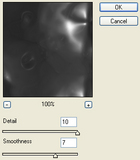
Then, we will chrome out this image. Go to Filter/ Sketch/ Chrome and use these settings:
3) Now we are gonna make this image come to life. Duplicate the image 3 times. On the top two layers do the following alterations:
a) Filter/ Distort/ Wave <use the Default settings and hit the "Randomize" button, now click OK.
B) Set Blend Mode to "Lighten".
On the third layer from the top do these alterations:
a) Filter/ Distort/ Wave <set Type: Triangles and hit the "Randomize" button, now click OK.
B) Set Blend Mode to "Lighten".
and
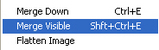
4) Hit Shift+Ctrl+E (Merge Visible Layers) or select it from the Layer menu
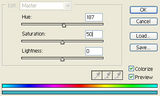
We are gonna give this image some color now, so lets Image/ Adjustments/ Hue/Saturation and do the following:
Your image will come out something like this
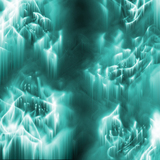
5)Time to add the final alteration, ice. Select Image/ Rotate Canvas/ 90 CW. Now, Filter/ Stylize/ Wind... When You have done that, Image/ Rotate Canvas/ 90 CCW.
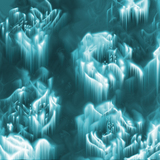
This is your final image:
Here is another alteration, since all images won't come out the same way. I used different hue/saturation settings.
I hope you enjoyed this tutorial, it is very quick and easy.


 Reply With Quote