


EDIT: I seem to have forgot to put "tutorial" in my topic. If a friendly mod could do it for me since I can't seem to add it I'd be greatly appreciative.
Forgive me, this is my first time posting here as well as my first tutorial. Hope at least 1 person enjoys this. If not, there is always the old drawing board ^_^.
1. Make a new image. Any size will do, but for this tutorial I made a 500x500.
2. filter -> render -> clouds
3. filter -> render -> difference clouds
4. duplicate the original layer
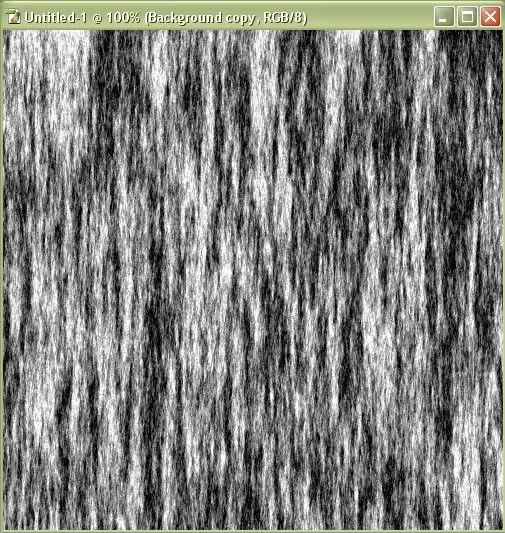
5. On the new layer go to filter -> render -> fibers. Use 23 Variance and 4 strength and you should get something like this
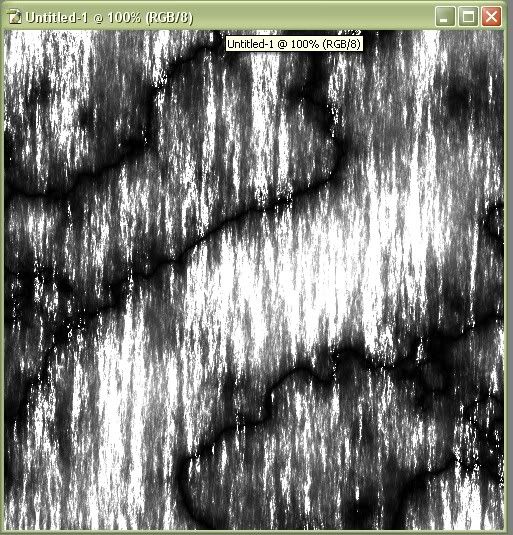
6. Change the blending mode on that layer to color dodge
7. press Ctrl + E to merge the layers
you should have something like this.
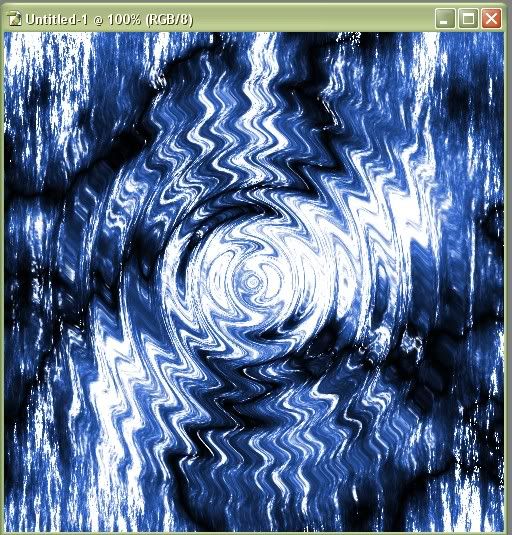
8. ctrl+u, click "colorize" and use hue: 220 Saturation: 60 lighten: 0. or any other bluish color.
9. Now, select filter -> distort -> zigzag. Amount: 22 Ridges: 7 and the Style set to Pond Ripples
10. Filter -> pixelate -> fragment
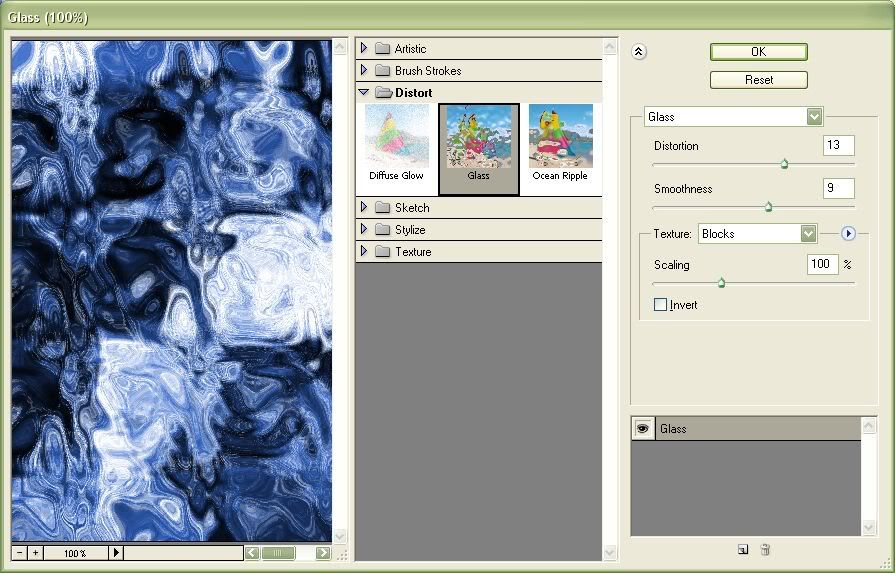
11. Now, filter -> distort -> glass with the following settings.
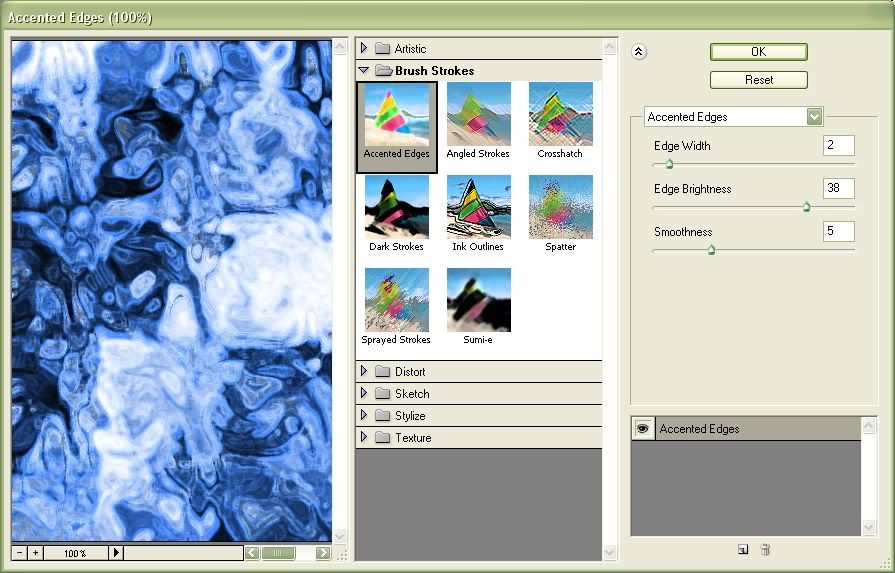
12. And finally filter -> brush strokes -> accented edges with the following settings.
^_^ all done. If all went well you should be looking at something similar to this
Sometimes it takes a couple times to get one just right.
The best things to mess around with are the glass and accented edges filters.
Using 1 for edge width for accented edges filter gives a nice look, but makes it look like more something you see under a microscope then a landscape.


 Reply With Quote